Table of Contents
When you are going to use an image for product promotion or upload it to the product listings, using a suitable background is a key factor.
On that note, removing the background is the best method to do that. Using the deep etching technique, you can separate your product from its unstable background in Photoshop.
Through this article, you are going to learn how to deep etch in Photoshop. You can separate an object using numerous Photoshop tools to get rid of the background. In this article, we are going to introduce you to the most accurate way to deep etch an image in Photoshop.
5 Steps To Follow On How To Deep Etch In Photoshop?
Step 1: Unlock Background Layer
After getting your image in Photoshop, you just need to double-click on the layer to unlock it. We are going to proceed with that image.

As you can see, the background layer has been unlocked. Now, you have to pick a suitable selection tool.
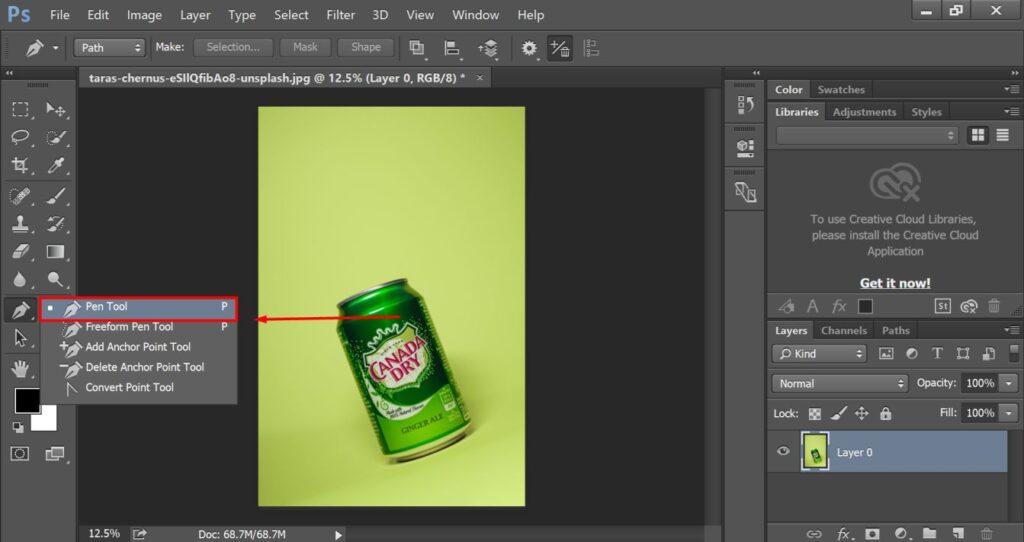
Step 2: Select The Object With The Pen Tool
You can access the pen tool from this section in Photoshop.
After picking the tool, you have to zoom in on the product photo and start creating lines to select the product. You have to left-click on the mouse to create an anchor point.
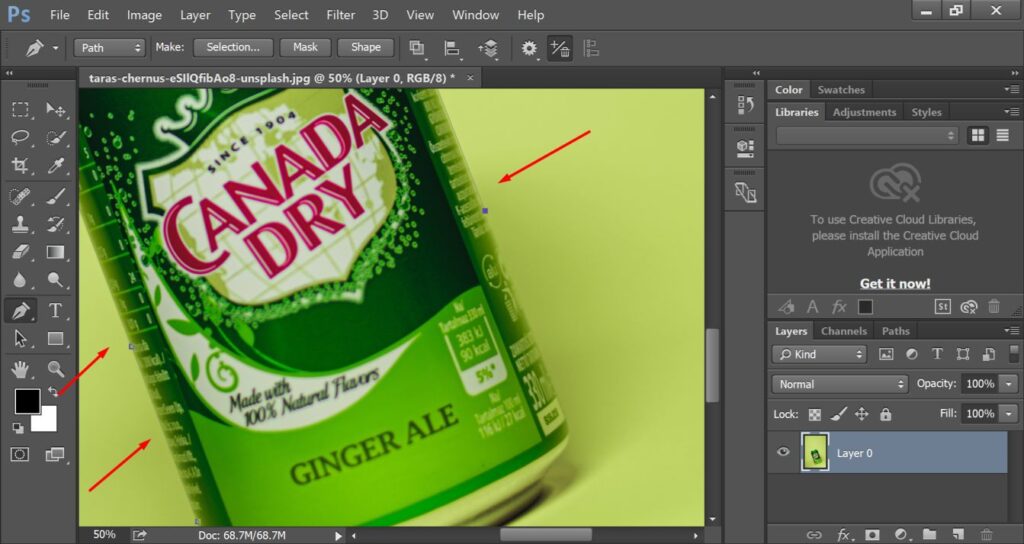
You can drag the mouse left and right to change the direction of the path. To create a perfect deep-etched image, you need to make sure that the paths are perfectly aligned with the object’s outer line.
Step 3: Convert Path To Selection
You have to finish the path at the starting point where you created it at the starting point. Let’s have a look here.
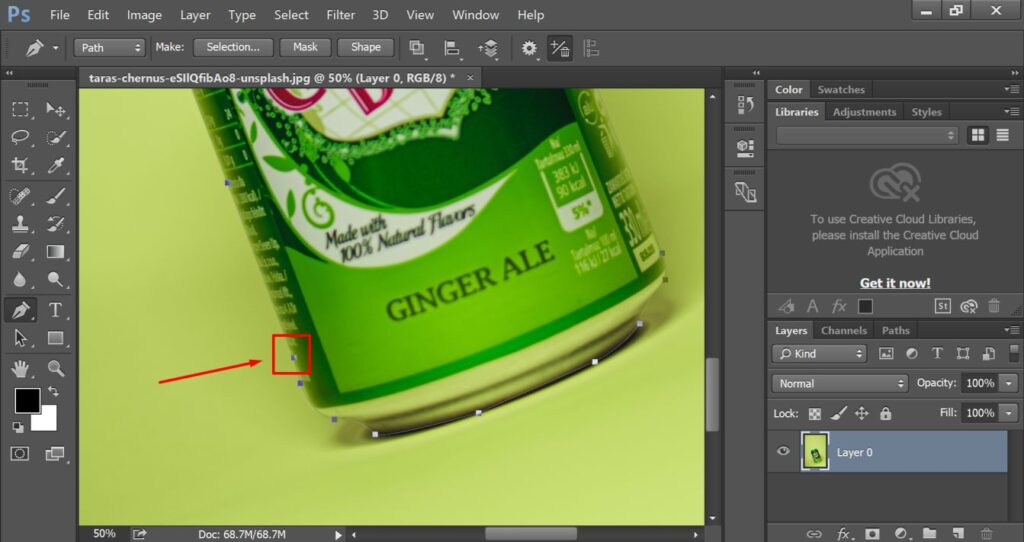
After that, you just need to right-click anywhere on the image and you will get the option “Make Selection”.
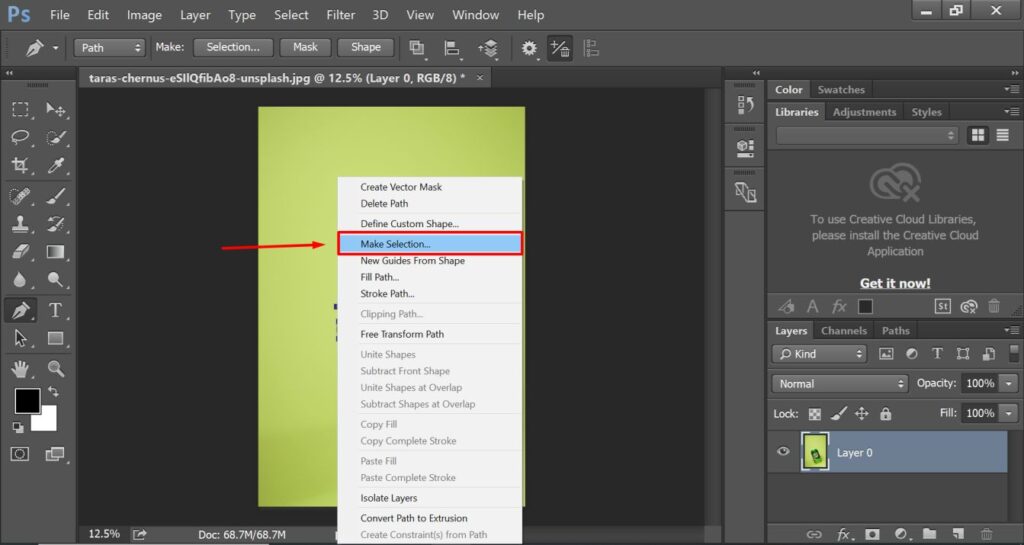
Click on that option to convert your created path into a selection. Then, you have to use the shortcut key CTRL + SHIFT + I. It will bring your product photography into this form.
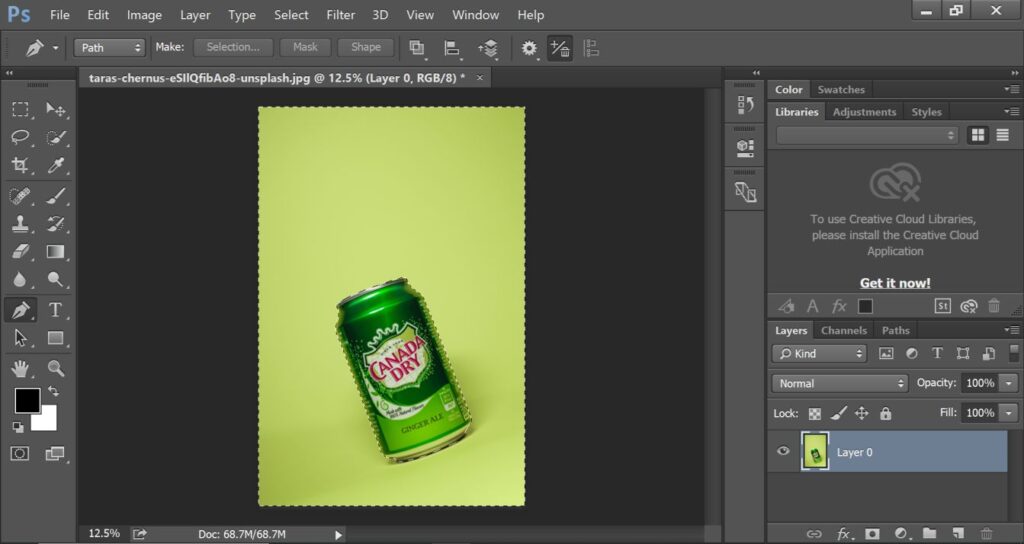
Now, it’s time to separate the selected product from its background.
Step 4: Remove Background
You just need to click on the delete key from your keyboard to remove the background. It will make the background transparent as you have unlocked the layer.
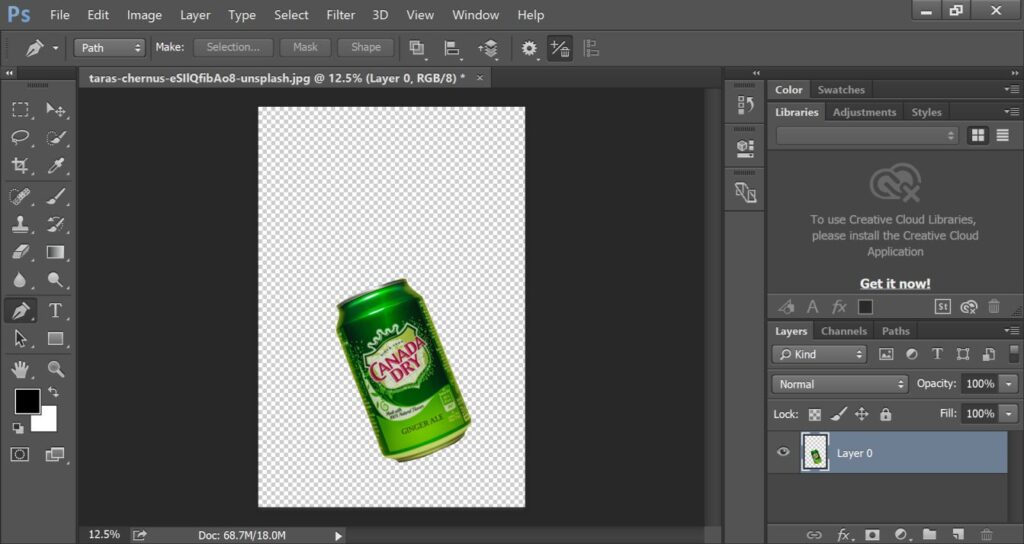
Now, we just need to fix the position of the product.
Step 5: Center The Product
At this stage, you have to press CTRL + T to get the free transform option. You will notice a box having an option to rotate the product. Click on the rotation icon and rotate the product to look straight.
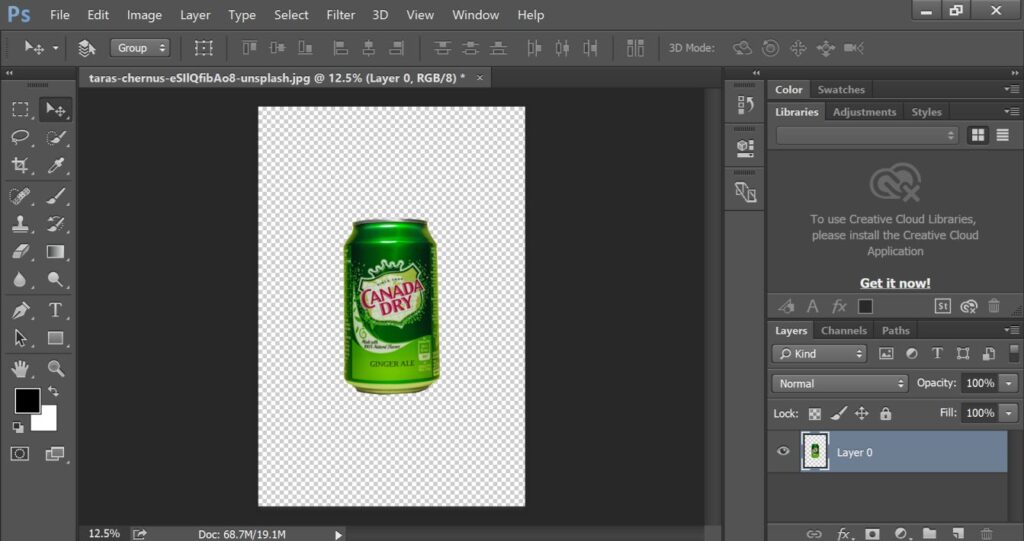
Then, use the arrow key to position the product at the center of the frame. That will make the product way more attractive than before. You can save the image from the file option.
3 Tips To Gain Accuracy On Photoshop Deep Etching
- Zoom in on the product to get more details
- Apply a feather to make the edges softer
- Save the path to work on later if required
3 Mistakes That Create Errors on Photoshop Deep Etching
- Do not apply the feather too much
- Don’t forget to hold the SHIFT key to resize the product
- Don’t save the image as JPG when looking for transparency.
Sum Up
That’s the best method for how to deep etch in Photoshop. By following the above method, you can deep etch an image in Photoshop like a professional editor.
On the first try, it may seem a bit challenging to you. But you are going to get used to the technique after trying several times.
Would you like to get a Professional Deep Etching Service for your product photography? You can start your journey now with a free trial.
Frequently Asked Questions (FAQ)
What tool in Photoshop is best for deep etching?
The Pen Tool is the go-to tool for deep etching in Photoshop. It is the best choice for accurate selection.
How do I create a path when deep etching?
Use the Pen Tool to create anchor points around the edges of the object and then connect them to form a path.
How can I refine my deep etching selection for better results?
While making a selection, you should set the feather to 1 to refine the selection.
How do I save my paths for future use in Photoshop?
You can save your paths by going to the Paths panel in Photoshop. Then, you have to right-click on the path you want to save.

