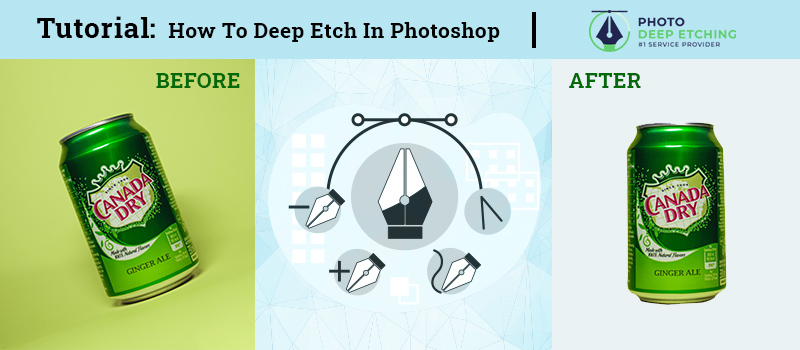
The pen tool is the most versatile and flexible tool in Photoshop. We can use this tool for both basic, intermediate, and advanced-level editing. Through this article, we will inform you how to use pen tool in Deep Etching. You can use the trick for Deep Etching Service and isolate the main object from the image.
Alongside this, there will be some bonus tips for you to make your editing more accurate and furnished. Let’s start with the basic concept of deep etching and then you are going to show the step-by-step tutorial to use the pen tool in Photoshop.
Table of Contents
What is Deep Etching in Photoshop?
Deep etching is the method of separating an object from its background so that it doesn’t take away attention from the background. The pen tool is used to apply this background separation process. This tool is the best option for Photoshop deep etching due to its superior control over the selection of objects with any shape.
Importance of Deep Etching for Website Owners?
The Deep etching service is mostly important for E-commerce website owners and online sellers. If you have a close look at the e-commerce websites, you will find the product photography without having any distractive or busy background. Having a busy background can be costly in the form of losing attention from the buyers.
The process of background removal makes sure that you present and promote your product with all the attention in it. When there is no background with the product, online buyers are going to focus on the item that you are going to sell. Millions of products are available online for every category. You only have a few seconds to convince online buyers to have a closer look at the product.
Understanding the Pen Tool
To bring the best out of the pen tool, you need to have an understanding of the functionalities of the pen tool. Basically, it works with paths and anchor points. You need to click on the left mouse key to create anchor points. The connections between anchor points are called paths. To make an accurate selection for the best background removal, you have to create anchor points around the path perfectly.
Overview of the Pen Tool
You can get the pen tool in Photoshop from this section.
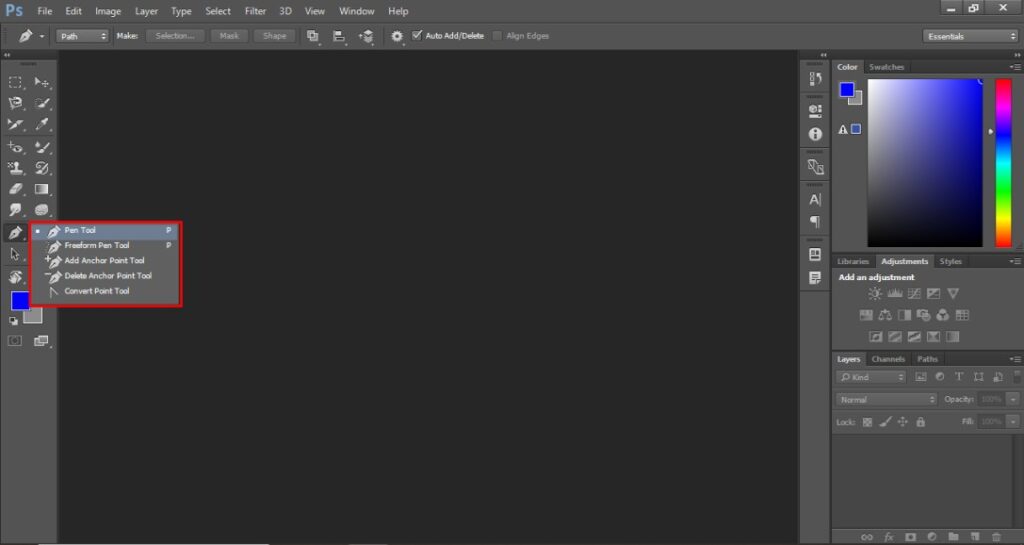
As you can see, there are four types of options available in pen tools. But the first option “Pen Tool” is mainly used for creating paths. The 2nd option is the freedom pen tool. You can use this tool to make automatic anchor point creation on the object edges. This works fine on objects with sharp and hard edges.
Basic Pen Tool Functions
The basic function of the pen tool is to zoom in on the object and create anchor points aligning with the boundary line of the object. If you want to create a curved path, you need to drag the mouse left and right to get bend lines.
You can change the direction of the path by pressing the ALT key and rotating the direction line of the anchor point. To create a new anchor point within a path, you need to press the ALT key and click on the point. To make anchor points visible, you have to hold the CTRL key and drag the mouse over the paths.
Mastering Pen Tool Shortcuts
“P” is the shortcut key to enable the pen tool in Photoshop. Apart from that, you may have to undo a path while working on the pen tool. You can do that with the “Z” button. To save a created path, you need to click on the path and double-tap on it.
Step-by-Step Tutorial: Deep Etching with the Pen Tool
You have to follow this step-by-step tutorial to create deep etching with the pen tool.
Step 1: Preparing the Image
We need to start by opening the image in Photoshop. That’s the basic preparation for the initial stage. If you have multiple shots of the product, choose the best one with more attention to detail.
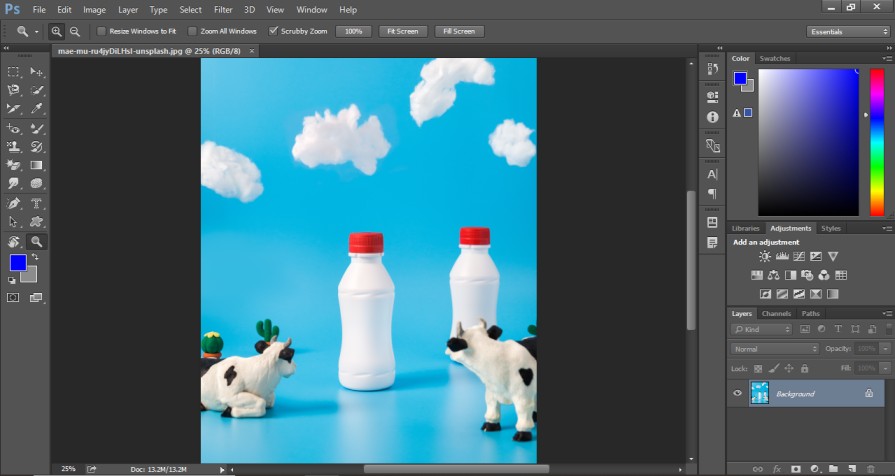
After that, you have to unlock the background layer so that you can make the background transparent in the later step. We are going to work on this image for this deep etching tutorial guidelines.
Step 2: Selecting the Pen Tool
You need to pick the pen tool in the second step. You can get it from here.
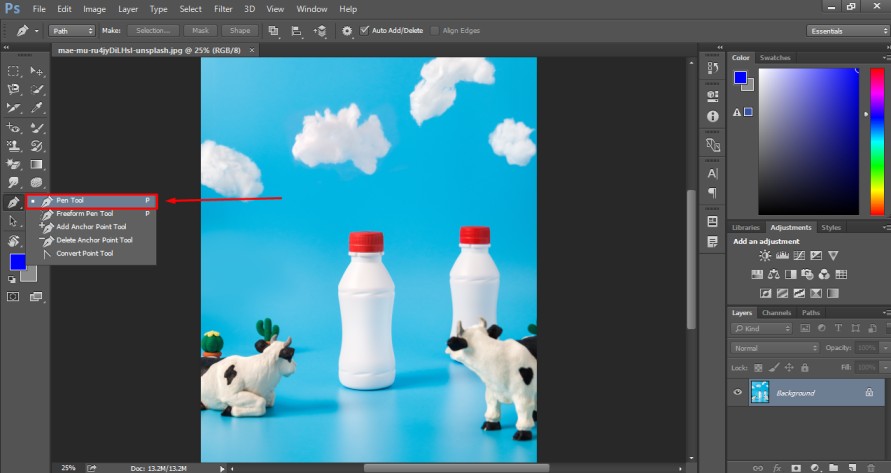
From the multiple pen tool option, you have to choose the “Pen Tool” from the top. You can also turn it on with shortcut P.
Step 3: Creating Anchor Points
This is the step that defines the accuracy of your selection and the final image result after deep etching. You have to click on the object’s boundary area and create anchor points around it.
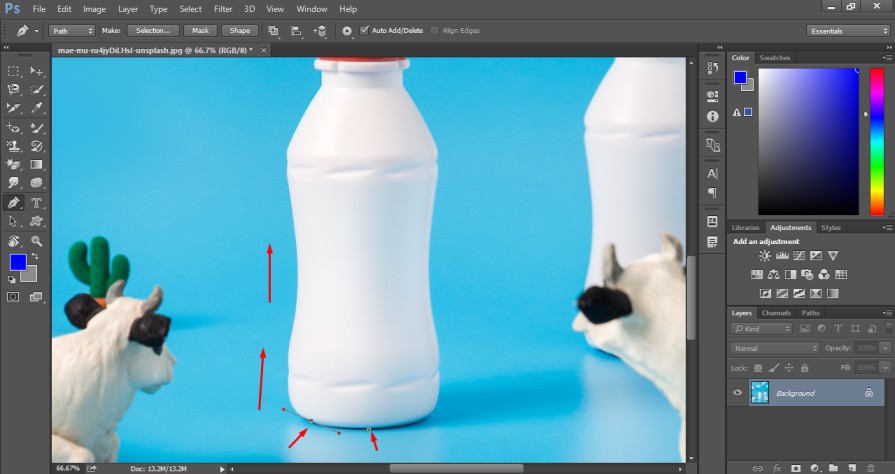
You have to do it in this direction. If you start from the above, you need to proceed to the below direction.
Step 4: Drawing Paths
To draw the paths perfectly, you should zoom in on the image. You have to cover the entire object by drawing paths. The whole object should be covered with paths in that form.
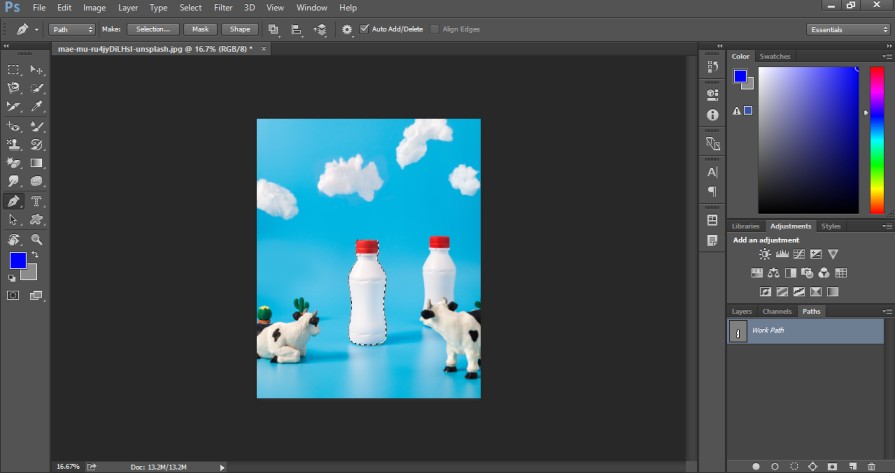
Make sure that you have not included anything from the background or excluded anything from the product.
Step 5: Refining the Selection
At this stage, we have to work on refining the selection. We can do it from the make selection option. After drawing vector paths, you have to click on the right mouse key and select “Make Selection”. It will show you this box.
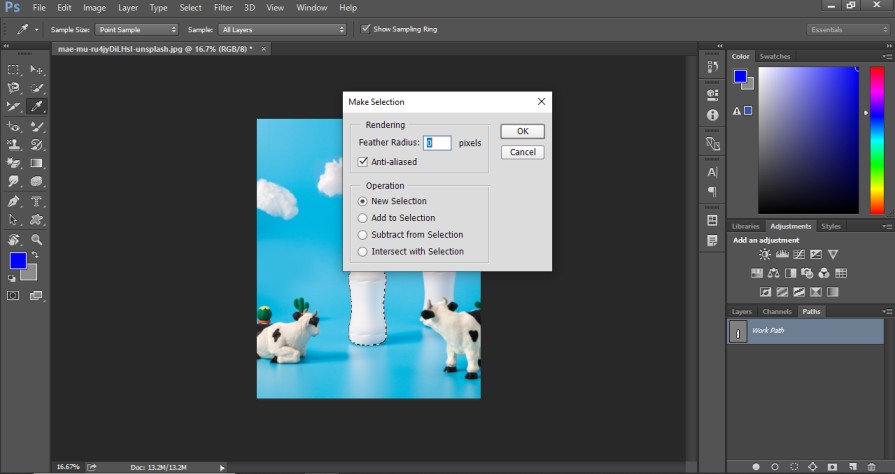
You have to set a value around 0.3 to refine the selection. You have to set the value considering the edge of your product.
Step 6: Saving the Deep Etched Image
After that, you just need to press CTRL + SHIFT + I to make a reverse selection. Then, press the delete and it will remove the background. You will get your product on a transparent background just like this one.
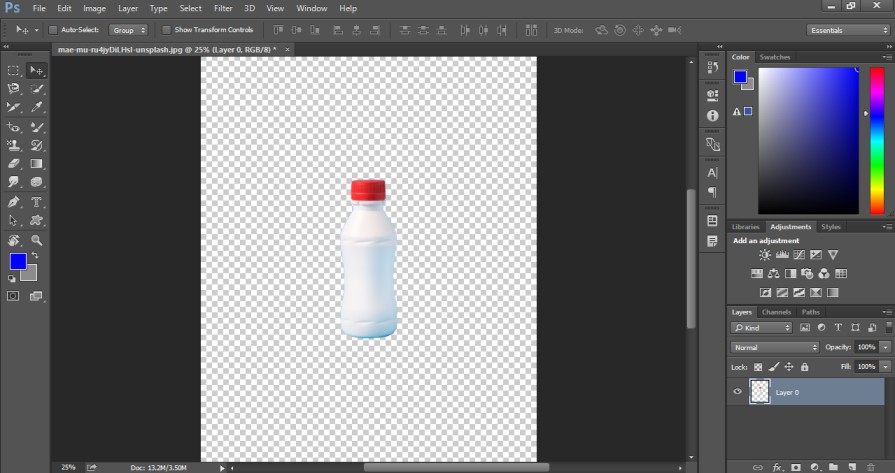
Go to the file option from the top and choose “Save” to save the deep-etched image. You will get different formats to choose from. Select the suitable image format based on your requirements.
Tips and Best Practices-
Here are some bonus tips to make your editing more accurate and bring perfection to it. That will do the background removal for your product photography.
Creating Smooth and Precise Selections
- 1. Always zoom in on the object 300% to have a clear overview of the edges.
- 2. Create anchor points only where necessary to ensure flawless selection.
- 3. While working on an object with soft edges apply the feather radius option.
Avoiding Common Mistakes with the Pen Tool
- 1. Don’t apply the feather radius option excessively it will blur the edges.
- 2. Don’t use the freedom pen tool in e-commerce product photography.
- 3. Don’t include anything from the background with the path selection.
Wrap Up
That’s a comprehensive guide on how to use pen tools in Deep Etching. By following the tricks that we have mentioned, you can remove the background perfectly and produce the best possible deep etching results.
If you have a lot of images to work on, you can choose Deep Etching to outsource your image editing tasks. Highly skilled professionals are available to do the task.
FAQ’s
What are the steps to use the pen tool?
The basic steps are to select the pen tool and create vector paths through anchor points. You have to click on the left mouse key to create anchor points.
How to make a deep etch image?
To make a deep etched image, you have to open the image in Photoshop and extract the background by creating paths.
What is a Pen tool and its uses?
Pen tool is a primary selection tool in Photoshop used for selecting multiple objects with different shapes. The main task is to make vector paths.
What is the main function of the Pen tool?
The main function of the pen tool is to create anchor points and make selections to apply specific changes to the selected area.

